docker部署Nginx1.19+PHP8.0
PHP8被称为php可以对抗静态语言的一个跨时代版。
一直也对它很向往,今天在docker里部署一下见识见识它的真面目。(截止目前最新版本为PHP8.0-RC3)
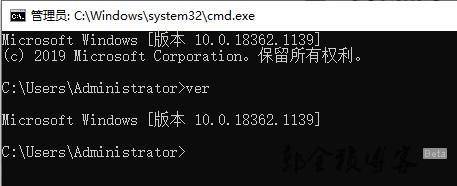
本地环境 win10 18362.1139
前提需要安装的docker就不多说了,安装教程下载安装就好。
https://www.runoob.com/docker/docker-tutorial.html
注:如果是win10 2004版本的话可以使用wsl2去安装docker,估计效率会快一点。
因为系统版本过低,我这里并没有安装 Docker for Windows Installer。
话不多说走起~
部署思路:
1.安装必要软件 docker-toolbox/Docker Desktop
2.Docker里面部署一台Nginx容器和一台PHP容器,在Nginx上通过反向代理连接到PHP容器上,完成Nginx+php的环境部署。
1. 在本地工作目录设置文件映射
为什么要设置映射?将相关的config文件、log文件和web目录映射到本地,这样就不用登陆docker进行部署维护了。
cd ~
mkdir /nginx-docker-demo
cd nginx-docker-demo
mkdir {conf,html,logs}
注:这里有两个坑。
-docker的挂载的操作docker -v 主机目录:容器的目录,但是主机的目录必须在~(c盘对应的用户目录)下
如果非用户目录,不会报错,但是容器对应的目录下没任何内容。
$ $PWD bash: /c/Users/Administrator: Is a directory -VirtualBox版本需要在6.0以上 nginx.conf映射的时候才不会报错
2. 在本地目录中配置config文件
这些文件主要是nginx的默认配置文件。大家可以从安装好的nginx中获取。
配置文件有2个:
- 原生nginx目录下的:/etc/nginx/nginx.conf
- 原生nginx目录下的:/etc/nginx/conf.d/default.conf
注:一下提供的配置文件内容均为nginx:1.19 版本的原生内容
nginx.conf:
user  nginx;
worker_processes  1;

error_log  /var/log/nginx/error.log warn;
pid        /var/run/nginx.pid;

events {
    worker_connections  1024;
}

http {
    include       /etc/nginx/mime.types;
    default_type  application/octet-stream;

    log_format  main  '$remote_addr - $remote_user [$time_local] "$request" '
                      '$status $body_bytes_sent "$http_referer" '
                      '"$http_user_agent" "$http_x_forwarded_for"';

    access_log  /var/log/nginx/access.log  main;

    sendfile        on;
    #tcp_nopush     on;

    keepalive_timeout  65;

    #gzip  on;

    include /etc/nginx/conf.d/*.conf;
}
conf/default.conf
server {
    listen       80;
    listen  [::]:80;
    server_name  localhost;

    #charset koi8-r;
    #access_log  /var/log/nginx/host.access.log  main;

    location / {
        root   /usr/share/nginx/html;
        index  index.html index.htm;
    }

    #error_page  404              /404.html;

    # redirect server error pages to the static page /50x.html
    #
    error_page   500 502 503 504  /50x.html;
    location = /50x.html {
        root   /usr/share/nginx/html;
    }

    # proxy the PHP scripts to Apache listening on 127.0.0.1:80
    #
    #location ~ \.php$ {
    #    proxy_pass   http://127.0.0.1;
    #}

    # pass the PHP scripts to FastCGI server listening on 127.0.0.1:9000
    #
    #location ~ \.php$ {
    #    root           html;
    #    fastcgi_pass   127.0.0.1:9000;
    #    fastcgi_index  index.php;
    #    fastcgi_param  SCRIPT_FILENAME  /scripts$fastcgi_script_name;
    #    include        fastcgi_params;
    #}

    # deny access to .htaccess files, if Apache's document root
    # concurs with nginx's one
    #
    #location ~ /\.ht {
    #    deny  all;
    #}
}
3.开始安装PHP-fpm环境
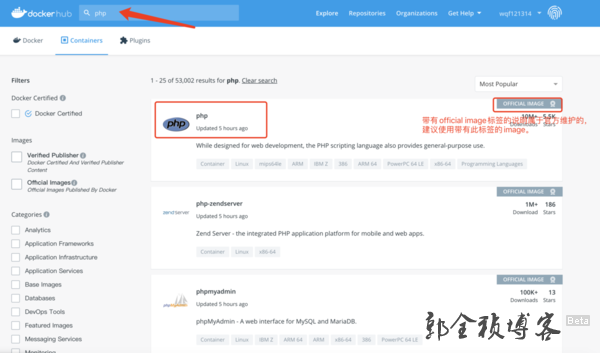
在DockerHub中搜索PHP镜像.
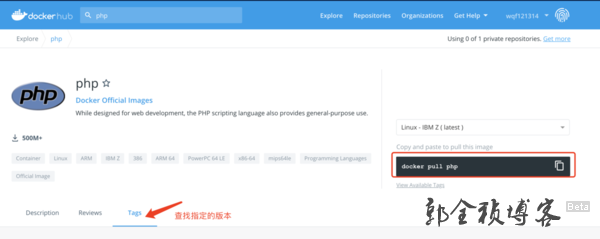
默认情况下可以直接通过建议的docker pull php 命令来安装php,但是由于要部署的是开发环境,所以还是需要找到一个对用的tags包。
Docker中PHP各版本的说明:
alpine: 精简版
//注:后续将不在提供类似截图,直接贴命令。。。
/**
*此命令意思是将 php:8.0-rc-fpm-buster 版本的景象下载到本地
*/
docker pull php:8.0-rc-fpm-buster
//通过 docker images 可以看到在本地的docker景象
docker images
/*
命令执行的结果:
REPOSITORY               TAG                 IMAGE ID            CREATED             SIZE
php                      8.0-rc-fpm-buster   b110f3c0e013        28 hours ago        405MB
*/

/**
安装php
命令解释:
docker run :启动docker景象
-d:后台启动
-p:设置端口映射,即将容器的9000端口映射到本地的9000端口。
    注意:本地端口:容器端口 (第一个9000是本地的端口,第二个9000是容器的端口)
--name:给容器命名
-v 配置文件映射
  ~/Docker/nginx/nginx/html:/var/www/html(将php目录的/var/www/html 映射到  /opt/nginx/html)
 ~/Docker/nginx/nginx/logs/:/var/log (将php目录的/var/log 映射到  /opt/nginx/logs/)
--privileged=true 获取宿主机root权限(特殊权限)
b110f3c0e013:参照docker ps命令对应的php的 IMAGE ID
这里使用19000是为了防止和电脑上的环境冲突
*/
docker run -d -p 19000:9000 --name php8.0 -v $PWD/html:/var/www/html -v $PWD/logs/:/var/log --privileged=true b110f3c0e013
4.安装nginx环境
//下载nginx容器景象
docker pull nginx
//启动nginx容器
/*
重点配置详解(注意路径位置):
  1.将nginx.conf 映射为我们在本地的nginx.conf
  ~/Docker/nginx/nginx.conf:/etc/nginx/nginx.conf
  2.nginx的代理配置文件
  ~/Docker/nginx/conf:/etc/nginx/conf.d
  3.输出到本地,参考php可以看出,将php和nginx的log统一输出到了
~/Docker/nginx/logs 路径下
~/Docker/nginx/logs:/var/log/nginx 将nginx的log
  4.web文件的目录映射到~/Docker/nginx/html,同样可以看到将php的/var/www/html文件和 nginx的文件/usr/share/nginx/html 均映射在一个地址下。
 ~/Docker/nginx/html:/usr/share/nginx/html
  5.将nginx的80端口映射成本地的8080端口

  特别注意:
      nginx.conf 在~/Docker/nginx 路径下
      default.conf 文件是配置在~/Docker/nginx/conf下
*/

docker run -d --name mynginx -p 8080:80 -v   $PWD/nginx.conf:/etc/nginx/nginx.conf -v  $PWD/logs:/var/log/nginx -v  $PWD/html:/usr/share/nginx/html -v  $PWD/conf:/etc/nginx/conf.d --privileged=true nginx
5.配置反向代理
nginx的反向代理主要是通过修改default.conf文件实现。
//1.查找php容器的ip地址
/*
最后面的的php8.0 是在前面php时,设置的容器名称,可以回看php的安装命令
*/
docker inspect --format='{{.NetworkSettings.IPAddress}}' php8.0
/*
结果(可以看到容器的IP地址为172.17.0.2):
% docker inspect --format='{{.NetworkSettings.IPAddress}}' php8.0
172.17.0.2
*/
配置default.conf文件
server {
    listen       80;
    listen  [::]:80;
    server_name  localhost;
  #设置字符集 UTF-8
    charset utf-8;

    #charset koi8-r;
    #access_log  /var/log/nginx/host.access.log  main;

    location / {
        root   /usr/share/nginx/html;
###
###在这里追加 index.php
###
        index  index.html index.htm index.php;
    }

    #error_page  404              /404.html;

    # redirect server error pages to the static page /50x.html
    #
    error_page   500 502 503 504  /50x.html;
    location = /50x.html {
        root   /usr/share/nginx/html;
    }

    # proxy the PHP scripts to Apache listening on 127.0.0.1:80
    #
    #location ~ \.php$ {
    #    proxy_pass   http://127.0.0.1;
    #}

    # pass the PHP scripts to FastCGI server listening on 127.0.0.1:9000
    #
###
###打开php的反向代理注解
###
    location ~ \.php$ {
#  设置web资料路径,注意这个路径是php的web资源路径
        root           /var/www/html;
#设置php容器的ip地址。
#通过docker inspect --format='{{.NetworkSettings.IPAddress}}' php8.0 得到
        fastcgi_pass   172.17.0.2:9000;
        fastcgi_index  index.php;
# 设置CGI解释器
        fastcgi_param  SCRIPT_FILENAME  $document_root$fastcgi_script_name;
        include        fastcgi_params;
    }

    # deny access to .htaccess files, if Apache's document root
    # concurs with nginx's one
    #
    #location ~ /\.ht {
    #    deny  all;
    #}
}
6.测试
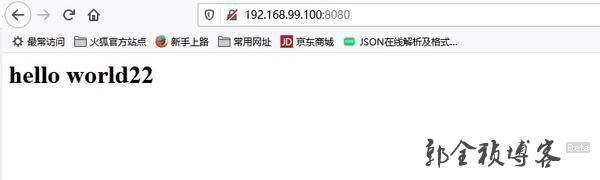
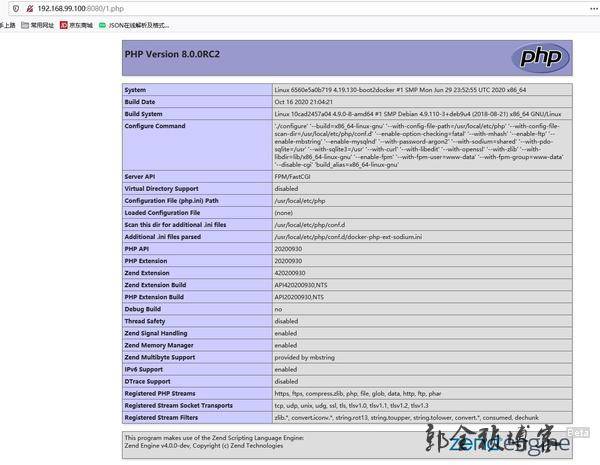
在本地html文件夹下创建2个文件index.html 和 1.php 进行验证。
index.html
<h1>hello world22</h1>1.php
<?php
echo phpinfo();
最终运行结果
php运行失败可以查看nginx日志,排查错误。尤其注意nginx中php-fpm的端口设置!
参考地址:
https://www.jianshu.com/p/53c5fa7e5561
https://www.jianshu.com/p/49fce964d1b3