centos安装lnamp环境全过程
1.下载镜像 http://mirrors.163.com/centos/7/isos/x86_64/ 本地采用最小化安装 安装教程参考:http://jingyan.baidu.com/article/25648fc1a235c99191fd0008.html
2.基本配置:
配置本地ip
更新源
安装基本库
安装编译环境:
# yum install gcc gcc-c++安装一些必备的库
#yum install ncurses-devel zlib-devel libjpeg* libpng* freetype*注:ncurses-devel – 编译安装mysql5.5时需要
zlib-devel – 编译安装httpd需要
libjpeg*、libpng*、freetype* – 编译安装php需要
安装nginx (虚拟机ip:144)
#yum install nginx提示:No package nginx available
问题原因:nginx位于第三方的yum源里面,而不在centos官方yum源里面
- 先安装nginx的yum源http://nginx.org/en/linux_packages.html#stable 找到链接,安装:rpm -ivh http://nginx.org/packages/centos/6/noarch/RPMS/nginx-release-centos-6-0.el6.ngx.noarch.rpm
yum install nginx
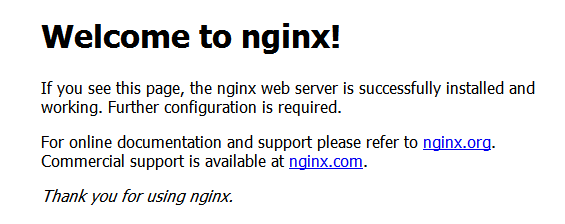
输入ip 可以看到

注:要先开启80端口
安装apach
yum install httpd -y

#chkconfig --levels 235 httpd on

#service httpd start 启动
安装php
yum install php*

yum install php-devel

yum install php-gd

yum install php-mcrypt

yum install php-mbstring
OK 等所有的都升级完以后,用php -m查看下加载
安装mysql
yum -y install mysql-server mysql mysql-devel

#chkconfig --add mysqld (在服务清单中添加mysql服务)

#chkconfig mysqld on (设置mysql服务随开机启动)

#service mysqld start (启动mysql服务) 增加mysql用户:mysql>GRANT ALL PRIVILEGES ON *.* TO monty@localhost IDENTIFIED BY ‘password’ WITH GRANT OPTION;
mysql>FLUSH PRIVILEGES;参考地址:
http://jingyan.baidu.com/article/a3aad71acae28eb1fb009698.html?qq-pf-to=pcqq.c2c
http://jingyan.baidu.com/article/25648fc1a235c99191fd0008.html
http://jingyan.baidu.com/article/e4d08ffdd417660fd3f60d70.html
http://www.codesec.net/view/195997.html
http://jingyan.baidu.com/article/a3aad71acae28eb1fb009698.html?qq-pf-to=pcqq.c2c
http://blog.csdn.net/sysprogram/article/details/39204133
http://jingyan.baidu.com/article/29697b913c4a2cab20de3cd9.html
http://www.centoscn.com/mysql/2014/1219/4335.html
后续补充
mongo
ps -ef | grep 'mongo'
kill 进程ID
nohup脚本
#!bin/sh
rm -rf /home/mongo/data/mongod.lock
nohup /home/mongo/bin/mongod -f /home/mongo/mongo.conf >/dev/null 2>&1 &
启动 sh /home/mongo/start.sh
auth配置
cfg={ _id:"mymongo", members:[ {_id:0,host:'127.0.0.2:27017',priority:30}, {_id:1,host:'host:'127.0.0.3:27017',priority:20},{_id:2,host:'127.0.0.4:27017',arbiterOnly:true}] };
use admin
db.createUser({ user:"root", pwd: "123", roles: [ { role: "root", db: "admin" }] });
use reptile
db.createUser({ user:"test", pwd: "123123", roles: [ { role: "dbOwner", db: "reptile" }] });
nginx
启动 service nginx start
重启 service nginx reload 或 service nginx restart
关闭 service nginx stop
状态 service nginx status
mysql root heishi.88
启动 /etc/init.d/mysqld start
重启 /etc/init.d/mysqld reload 或 /etc/init.d/mysqld restart
关闭 /etc/init.d/mysqld stop
状态 /etc/init.d/mysqld status
php71
启动 service php71-php-fpm start
重启 service php71-php-fpm reload 或 service php71-php-fpm restart
关闭 service php71-php-fpm stop
状态 service php71-php-fpm status
php56
启动 service php56-php-fpm start
重启 service php56-php-fpm reload 或 service php56-php-fpm restart
关闭 service php56-php-fpm stop
状态 service php56-php-fpm status
mysql
启动 service mysqld start
重启 service mysqld reload 或 service mysqld restart
关闭 service mysqld stop
状态 service mysqld status
设置开机启动
chkconfig 方式
查看开机列表
chkconfig --list
添加
chkconfig –add nginx
开机启动
chkconfig nginx on
安装mysql
mysql 5.6 (完整)
一、检查系统是否安装其他版本的MYSQL数据
#yum list installed | grep mysql
#yum -y remove mysql-libs.x86_64
二、安装及配置
# wget http://repo.mysql.com/mysql-community-release-el6-5.noarch.rpm
# rpm -ivh mysql-community-release-el6-5.noarch.rpm
# yum repolist all | grep mysql
安装MYSQL数据库
# yum install mysql-community-server -y
设置为开机启动(2、3、4都是on代表开机自动启动)
# chkconfig --list | grep mysqld
# chkconfig mysqld on
mysql5.7
wget https://dev.mysql.com/get/mysql57-community-release-el6-9.noarch.rpm
rpm -Uvh mysql57-community-release-el6-9.noarch.rpm
或
yum localinstall -y mysql57-community-release-el6-9.noarch.rpm
2.安装mysql
yum install mysql-community-server
3.开启mysql服务
service mysqld start
给root账户设置密码,输入命令:
mysql_secure_installation
第一步:直接回车;
第二步:是否设置root密码,输入”y“,输入两遍密码;
第三步:是否删除anonymous账号,输入”y“;
第四步:是否禁止root账号远程登陆,输入”y“;
第五步:是否删除test数据库,输入”y“;
第六步:是否重新加载授权信息,输入”y“。
CREATE USER 'testuser'@'%' IDENTIFIED BY 'password';
GRANT ALL ON *.* TO 'testuser'@'%';
mysql 初始化参考:http://jingyan.baidu.com/article/c1a3101e5c62b1de646deb6d.html
安装PHP7
参考:http://skinglzw.blog.51cto.com/10729606/1889170
http://www.cnblogs.com/719907411hl/p/6891061.html
一、删除旧版本
如果已经安装过php就先删除之前的版本。检查方法如下:
yum list installed | grep php
然后将安装的包进行删除
比如 yum remove php.x86_64 php-cli.x86_64 php-common.x86_64 php-gd.x86_64 php-ldap.x86_64 php-mbstring.x86_64 php-mcrypt.x86_64 php-mysql.x86_64 php-pdo.x86_64
具体根据显示的安装列表的名称进行相应的删除
二、安装新版版
1. 更新yum安装包
追加CentOS 6.8的epel及remi源。
# rpm -Uvh http://mirrors.ustc.edu.cn/fedora/epel/6/x86_64/epel-release-6-8.noarch.rpm
# rpm -Uvh http://rpms.famillecollet.com/enterprise/remi-release-6.rpm
以下是CentOS 7.0的源。
# yum install epel-release
# rpm -ivh http://rpms.famillecollet.com/enterprise/remi-release-7.rpm
查看php包
yum search php
安装php7.1
yum install php71w php71w-cli.x86_64 php71w-common.x86_64 php71w-gd.x86_64 php71w-ldap.x86_64 php71w-mbstring.x86_64 php71w-mcrypt.x86_64 php71w-mysql.x86_64 php71w-pdo.x86_64 php71w-fpm
将tcp改成socket方式的配置方法:
1、修改php-fpm.conf
;listen = 127.0.0.1:9000
listen = /dev/shm/php-fpm.sock
2、重启php-fpm,生成.sock文件
3、修改.sock文件权限
chown www:www /dev/shm/php-cgi.sock
其中www是php-fpm.conf里面设置的用户和群组
4、修改nginx配置文件
location ~ .*\.(php|php5)?$ {
#fastcgi_pass 127.0.0.1:9000;
fastcgi_pass unix:/dev/shm/php-cgi.sock;
fastcgi_index index.php;
include fastcgi.conf;
}
5、重启nginx
参考:http://jingyan.baidu.com/article/b907e6278bbf8d46e7891c15.html
http://crx.xmspace.net/socket_nginx_php-fpm.html

